Jun 11, 2010

Shining Tears Cosplay Weapon tutorial-Elwyn's wand

In our last post , we have talked about the Elmina Rhoderia' Cosplay wand tutorial , today we will continue to talk about another wand tutorial - Elwyn's wand from Shining Tears Cosplay.

It is clearly different from the process of Elmina's wand. Elwyn’s wand is eminent in the geometric mouldmaking which can be found in most of the Japanese manga works. So the process of Elwyn's wand and Elmina's wand is different.


The following is the original photo of Elwyn's wand.


I prefer to look at the pictures of the hand-made model when I make the prop.As the picture of the hand-made model looks more stereoscopic.The original picture is two-dimensional which is designed by the author at random without considering whether the model is three-dimensional or not. But it is a disaster to the maker of prop .


Main materials: 3 MM thick PVC foam board,5 MM thick EVA board,15 MM diameter stainless steel pipe with 120 CM length,20 MM diameter PVC water pipe,25 MM diameter PVC water pipe,one metal circle,white sheet iron,super glue,melt adhesive,AB glue,putty.


Make the body at first. Begin with wings.


Cut five pairs of PVC foam wings.


Glue five wings at each side by super glue. Each wing is bigger than another.


Each side has five PVC foam wings which makes a pair of symmetrical wings.


Cut EVA board into 15 mm wide strips(cut as you like), which can be seen below. Two EVA strips are needed.

Glue each wing to each EVA strip with melt adhesive.


The part glueing EVA strips and wings which looks stiff needs embellishment.Putty it, and grind it after solidification.Then the segment looks smooth.

In order that the wings look smooth,you can decorate the wings as above.


The next step is to make the top of the wand.


Fasten the metal circle to the screw with slim iron wire which makes it convenient to insert the metal circle in the water pipe.

I like to choose metal as the accessory.It depends on what you like.It is also a good choice to use the lightweight plastic ones.


I plan to insert the metal circle in the top PVC water pipe.But I choose the stainless steel pipe in order that the top handle is in shape and stable.

Now is to fix the metal circle on the stainless steel pipe.

Then fill the two openings of stainless steel pipe with AB glue reinforcing the top metal circle.

It is necessary to choose the suitable glue.

It depends.

Several kinds of glue are used when we make the prop.

For example it is convenient to use super glue to stick the small accessory and board.

It is ideal to use the hot melt adhesive for affusion. As the melt adhesive is not flowing but cooling quickly.

It is not convenient to use AB glue. But it is effective and stiff which is suitable to strengthen the unstable places.


Drill holes at the two sides of the stainless steel pipe, insert a metal bar and reinforce the metal bar with AB glue.The metal bar is to fix the wings which needs to be slim and not obvious. Thus it is better to choose the metal accessory bearing the weight.


The helix are made of two white sheet iron strips which have the same width as EVA strip.It is not wise to have wide white sheet iron strips. Be careful when you cut the white sheet iron.


It is better to stick the white sheet iron strips inside the EVA by AB glue. This makes it possible that white sheet iron strips are glued on EVA strips even the sheet iron strips are bent.

Drill holes at the side of wings.

Insert the metal bars in the wings and stick with AB glue.

Brush the handle and wings.(This can be done after the wand is finished.But it is a little troublesome.)

Do not spray the two EVA strips. If the EVA strips are sprayed right now, they may discolor when they are bent.


Twist the two EVA strips accroding to the picture,after the glue on the white sheet iron strips are solidified.

Although it is not easy to reshape EVA strips,the white sheet iron strips help to be in shape after delicate adjustment. It takes much time to adjust the shape of EVA strips. As the white sheet iron strips are also flexible which are not easy to control.

Do not cover the hole stainless steel pipe when you twist EVA strips around the steel pipe.

Leave the steel pipe at least 30 CM long without the helix in order that the top stainless steel pipe fits the below PVC water pipe later.


It is time to process the below handle.

Cut a 25 MM diameter, 10 CM long PVC water pipe.

Wrap a 0.33 MM thick plastic strip at each opening of the water pipe which makes the water pipe look nice.


Prepare a long 20 MM diameter PVC water pipe which is the main part of the wand.

How long is the water pipe?

It depends on what you like.

Fix the 25 MM diameter PVC water pipe in the long 20 MM diameter water pipe.

Melt adhesive can be used to fasten the two PVC water pipes.


The last but most important is to fix the top handle and the below handle.

Spray the left stainless steel pipe with hot melt adhesive and insert it in the PVC water pipe quickly.

Otherwise the melt adhesive will cool. And it is impossible to push the steel pipe in the water pipe.

In order not to meet such a problem, you can use AB glue. But it is troublesome.

Do not forget to spray the helix with propylene at last.

Now Elwyn’s wand in Shining Tears is finished.

May 20, 2010

Shining Wind Elmina Rhoderia' Cosplay wand tutorial

Do you know Shining Wind , one of hot games in PS2 . Today, we will show you our latest cosplay weapon tutorial - Elmina Rhoderia' Cosplay wand .


The wand is featured with irregular shape but there is no need to follow the original grain of the wand in the game , just look alike will be ok.

The original picture of the wand is below:

Material: PVC water pipe, iron wire,paper,transparent adhesive tape,epoxy resins,putty.

Do the following steps:

1. Bend the iron wire as a circle and insert the circle in the PVC water pipe.

2. Wrap the above with paper and transparent adhesive tape in layers until the wand head appears.The handle just touches concavo-convex, without special requirements.

3. The shape of the wand appears. Some alterations are still needed.I am anxious to finish the wand. Thus I plan to fix the handle in order that the finished part keeps in shape.

4. Mix up the epoxy resins in proper proportion.


5. Spray epoxy resins on the whole handle, ensuring the whole handle is sprayed with epoxy resins.The handle become firm after solidified by the epoxy resins.The epoxy resins passivate the handle and make the handle tender.


6. I continue to reshape the wand head. The diameter of the wand head is smaller than the original. Then I enlarge it by using knife and wrap the inside of the head with transparent adhesive tape again, making it look bulged


7. Brush the resins and then spray the primer on the wand in order to see the wand in details. (I prefer the black.)


8.Putty the hollow. (Fill the hollow with putty.)Although the resin passivates the paper,the wand is not stiff enough. Thus I do more to make it become better.


9. Rub down the wand and grind the tuber.


10. Then the wand touches slippery after the above procedures.


11. Spray the mixed paint on the wand.Just color the wand as you like.It does not matter whether the wand is colored like the original or not.I choose the bright color personallly.The bright color makes the wand seem to be plump. The wand touches more bulged than the model.


12. Put the colored wand in a dry place.


13. Find a plastic ball used for Christmas and perforate the two sides of the ball.


14. Perforate the two sides of the wand head too. Insert an iron wire between the two holes of the wand head to fasten the plastic ball.Right now the Elmina's wand in Shining Wind Cross is finished.

May 16, 2010

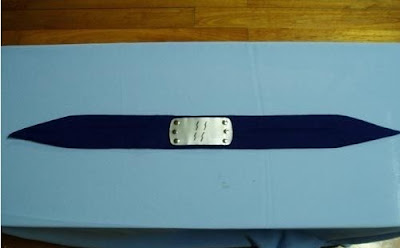
The easiest way to make a Naruto forehead guard


we have post many articles in cosplayclasses , but our webhost get some issues, and we can not get our data back ,especially the post photos. so we will try our best to recover our articles here , and we will continue to post many classic cosplay tutorials here fron now on.

Today, we will show you how to make a nice Naruto forehead guard yourself :)

To start with, let’s take a look at the materials.

then the following procedure:

1. use your blade or sharp equipment to slot a hatch on the surface of pop can near one end

2.cut of the upper and bottom surface of can with your scissor

3.cut vertical opening on the bottomless can, so it becomes to be a unfolded metal slice

4. turn the inside out, and draw a rectangle with width 5.5 centimeter and length 12.5 centimeter with mark pen

5.then draw a curve on each corner of it

6.cut the drawing off

7.place the can slice on a prepared paper board, and draw a similar shape on the board.

8.cut the drawing off too

9. fully cover double-sided adhesive on one of the paper slice


10. adhere the paper with the metal slice

11. then, mark 3 point on the left and right margins on the can slice

12. spear the 6 points with 6 tucks, then the center of the forehead guard is done

13. draw the icon of ninja village you’re about to make. (PS: do not copy the instructions, you can choose any icon you like)

14. cut off the icon

15. stick the icon on the forehead guard with double-sided adhesive


16. color the margin of paper board with silver hue and brush

17. scissor the cyan cloth in rectangle with width 17 centimeters and length 78 centimeters, then fold the cloth in width

18.cut off a triangle shape on the two end of cloth

19. cover the adverse side of forehead guard with double-sided adhesive

20. unfold the cloth, stick the forehead guard in the center of it

21. cover one side of a paper board with double-sided adhesive

22. stick the paper board in step 21 on the adverse side of the cloth, when you’ve done, the cloth should be nipped in two paper.

23. cover the other side of paper board just adhered with double-sided adhesive

24. fold the upper and bottom margins of cloth towards the adhesive façade

25. reverse the triangle part of an end

26. sew the corresponding margin of the triangle with needle and tread

27. sew the fold line in all margins, in the reverse side, use adhesive to stick the cloth on the material

28. then you’ve done the gorgeous Naruto forehead guard.

May 14, 2010

cosplay weapons - Sengoku BASARA Cosplay from Date Masamune

Today, we will show you the Sengoku BASARA Cosplay weapon from Date Masamune . Not really impressive but these Japanese swords - katana are good example for shape weapon from foam . so just check it out below :


Related Posts with Thumbnails